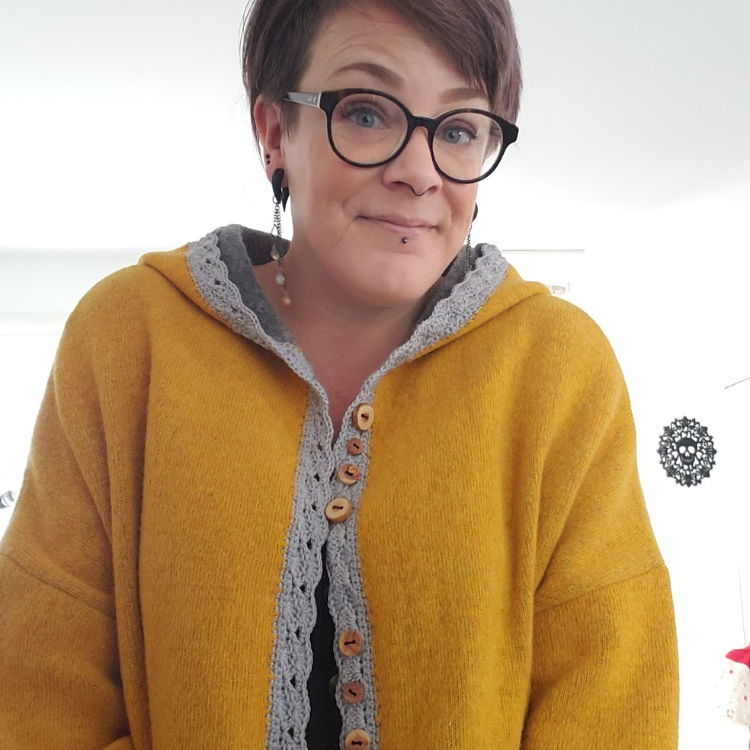
For a while now, this yellow sweater hung out in my closet. I knew it had potential, but 2 things about it annoyed me:
- No buttons or zips to close it;
- Despite being a gorgeous yellow, it was pretty boring to look at.
I wasn’t wearing it much, so I decided to test out an upcycling idea. It worked out perfectly. Here is how I worked this boring sweater upcycle crochet project.
You will need:
- 1 boring sweater
- Tiny steel hook (I used a 0.75 mm hook, but any tiny hook will do)
- Yarn that compliments the sweater
- Appropriate hook size for the yarn
- Tape measure
- Fine point marker
- Yarn needle and scissors
- Buttons (I used buttons from my friends at trukerie.com)
Step one : You need to create an edge onto which you will work your first crochet row.
- Work up a small swatch with your intended yarn and hook. You want to know how many stitches fit around the sweater or area you will work on. In my case, I fit 2 sts per centimeter.
- With the tape measure and pen, I marked every 0.5 cm around the sweater fronts and hood, including both front-bottom edges. I want the border to go all the way down the fronts.
- Count up your marks: this is your total stitch count. When choosing an edge pattern, you will need to work with this stitch count or you will need to adjust for your chosen pattern in Row 2 below. Alternatively, you can do a simple single crochet, half-double crochet, or double crochet border. This is ALL up to you. My favorite stitch pattern for edges has a stitch count of 6 + 1. You’ll find it below.
- With the steel hook, poke a hole at each mark. The sweater I used is made with a felted fabric that was easy to work directly onto, so I skipped this step.
Step two: Work a base around the sweater or area of your choosing.
- Row 1: With right side facing, join yarn with slip stitch in bottom edge of sweater, chain 1, single crochet in this and in each mark across, ending at opposite bottom edge, turn.
- Row 2 (use this row to add or substract stitches as needed): Chain 1, single crochet in first and in each stitch across, turn.
Step three: Work your chosen stitch pattern around the sweater or area of your choosing.
I chose the stitch pattern below because the closed shells are perfect to sew buttons onto, and the open shells are perfect button holes !
Here is the stitch pattern I used :
- Row 3: Single crochet in first stitch, skip 2, *5 double crochet in next (full shell), skip 2, single crochet in next, repeat from * across, turn.
- Row 4: Chain 4 (counts as double crochet + chain 1) in single crochet, double crochet in same stitch, *single crochet in 3rd double crochet of full shell, (double crochet, chain 3, double crochet – open shell) in next single crochet, repeat from * across first half; across second half replace open shells with closed shells, ending with 3 double crochet in last stitch, turn.
- Row 5: Chain 1, single crochet in same stitch, *full shell in next single crochet, single crochet in middle of next shell, repeat from * across, placing last single crochet in 3rd starting chain. Finish off and weave ends in.
Step four : Sew buttons onto one edge, opposite button holes (open shells).
Step five : Enjoy your new exciting upcycled sweater =)
If you use this tutorial to upcycle your boring sweater, tag @accrochet =)
Julie xx


